Welcome!!! I am so glad that you stopped by, I hope that you will take a minute and look around. If you like what you see please follow along!!!

If you are having trouble commenting, you can contact me at kristathompson11@gmail.com


Sunday, June 27, 2010

Portable Magnet Board

My son is really into the ABC's right now and he really like playing with his magnet letters on the magnet board he has in his playroom. So one day while we were playing with the letters the thought came to me, you need to find a portable magnet board for church!! And that's when the gears started turning and this was born. Would you like to make your own, I will show you, it's super easy!

Supplies:
Metal 
Travel Wipes Container 
Glue Gun 
Fabric 
Ribbon 
 
Lets Get started: 
First of all you need to cut your metal, I have an AWESOME dad who is nice enough to get me metal anytime I want, and the best part he cuts it to whatever size I need, saves me some time, thanks dad. So I had dad cut my metal 3 1/2 by 8 and then we rounded the corners just a bit to make it fit nice and snug. I tried a few different kinds of glue to get the metal to stick really good to the plastic and hot glue definitely works the best. 
 After I had my metal all glued in I just covered the outside with some fabric, if you don't know how to do this step just Google covered wipes case and you will find a ton of tutorials that will help you. 
 That's it! 
Well almost we just need to put our letters in and let the little ones enjoy! 
 In case your wondering, yes all of the letters fit in here and yes it will still close nice and tight!! 
Perfect for throwing in your bag, and hopefully it will keeps the kiddos entertained for awhile. 

Sunday, June 20, 2010

Disposable Camera Alternative

When I got married 4 years ago, the thing to do was have disposable cameras on each table, well let me tell you that it was a GIANT waste of money!! 98% of the pictures were off the wall or the bottom of their shoes, it was not what I was expecting! My little sister is getting married in a few weeks and we thought that we would try a different approach, we have a very picture happy family so hopefully it works. I ordered these cards from Vistaprint and I was able to 250 shipped for just over $10 bucks- way cheaper than what I spent!!

We got some super cute business card holders at Hobby Lobby, red with daisy's, but they are at her house and I don't want to wait to get them :) 

Fathers Day

First of all I want to say Happy Father's Day to all the awesome dads in my life, you know who you are!! I hope that you had an awesome dad, you all deserve it!!

When I was thinking about Fathers Day this year I was completely and totally STUMPED!! All the dads in our families have everything that they need or want which makes it really difficult to find something for them. Then I had a light bulb moment. Why not get them the most commonly used items that always seem to go missing? So we headed to Harbor Freight. 
We picked up the essentials- gloves, hammer, tape measure & flashlight. The things you always use but can never find!!  

I wanted a simple, manly card and I just love how this turned out. 
I found the word collage HERE

Now onto the most important part- The Treats!! 
I fell in love with THIS, and knew that it would be perfect. I wish mine looked more like hers but for my first try I was happy, and so were all the men! They loved it, a huge hit for sure!!


Everything turned out just how I planned and all the guys were happy, it was definitely a great day!

Saturday, June 19, 2010

Grab A Button!!

I finally made a button!! Go ahead and grab one from my sidebar if you would like!!


Thursday, June 17, 2010

My First Feature!


My VERY first feature!! I am still in shock!! Becky has such an awesome blog, I cannot believe she picked me!!
THANK YOU!!

Wednesday, June 16, 2010

The giveaway is now closed, thank you to everyone who entered!!

  1. I took off on a unplanned mini vacation and will be home tomorrow so I will post the winner as soon as I get home.  

Thursday, June 10, 2010

Cupcake Stands

I recently threw a bridal shower for my little sister, the colors for the wedding are red white and black and so I used those for the shower. I have seen cupcake stands all over the place recently and this is my version, I love how they turned out!!
I went to the DI and bought 3 different sizes of white plates and some glass candlesticks. I washed them all really well a couple of times and then let them air dry for a few hours to make sure they were nice and dry. I then took some black and red vinyl and punched out circles, i think they were 1.5 inches. And then it was peel and stick, all over the place! I used hot glue to attach them together on the day of the shower, so that I could take them apart afterwards so they were easier to store. Everyone loved them!!!

Linking up to the fun parties on my sidebar!

Monday, June 7, 2010

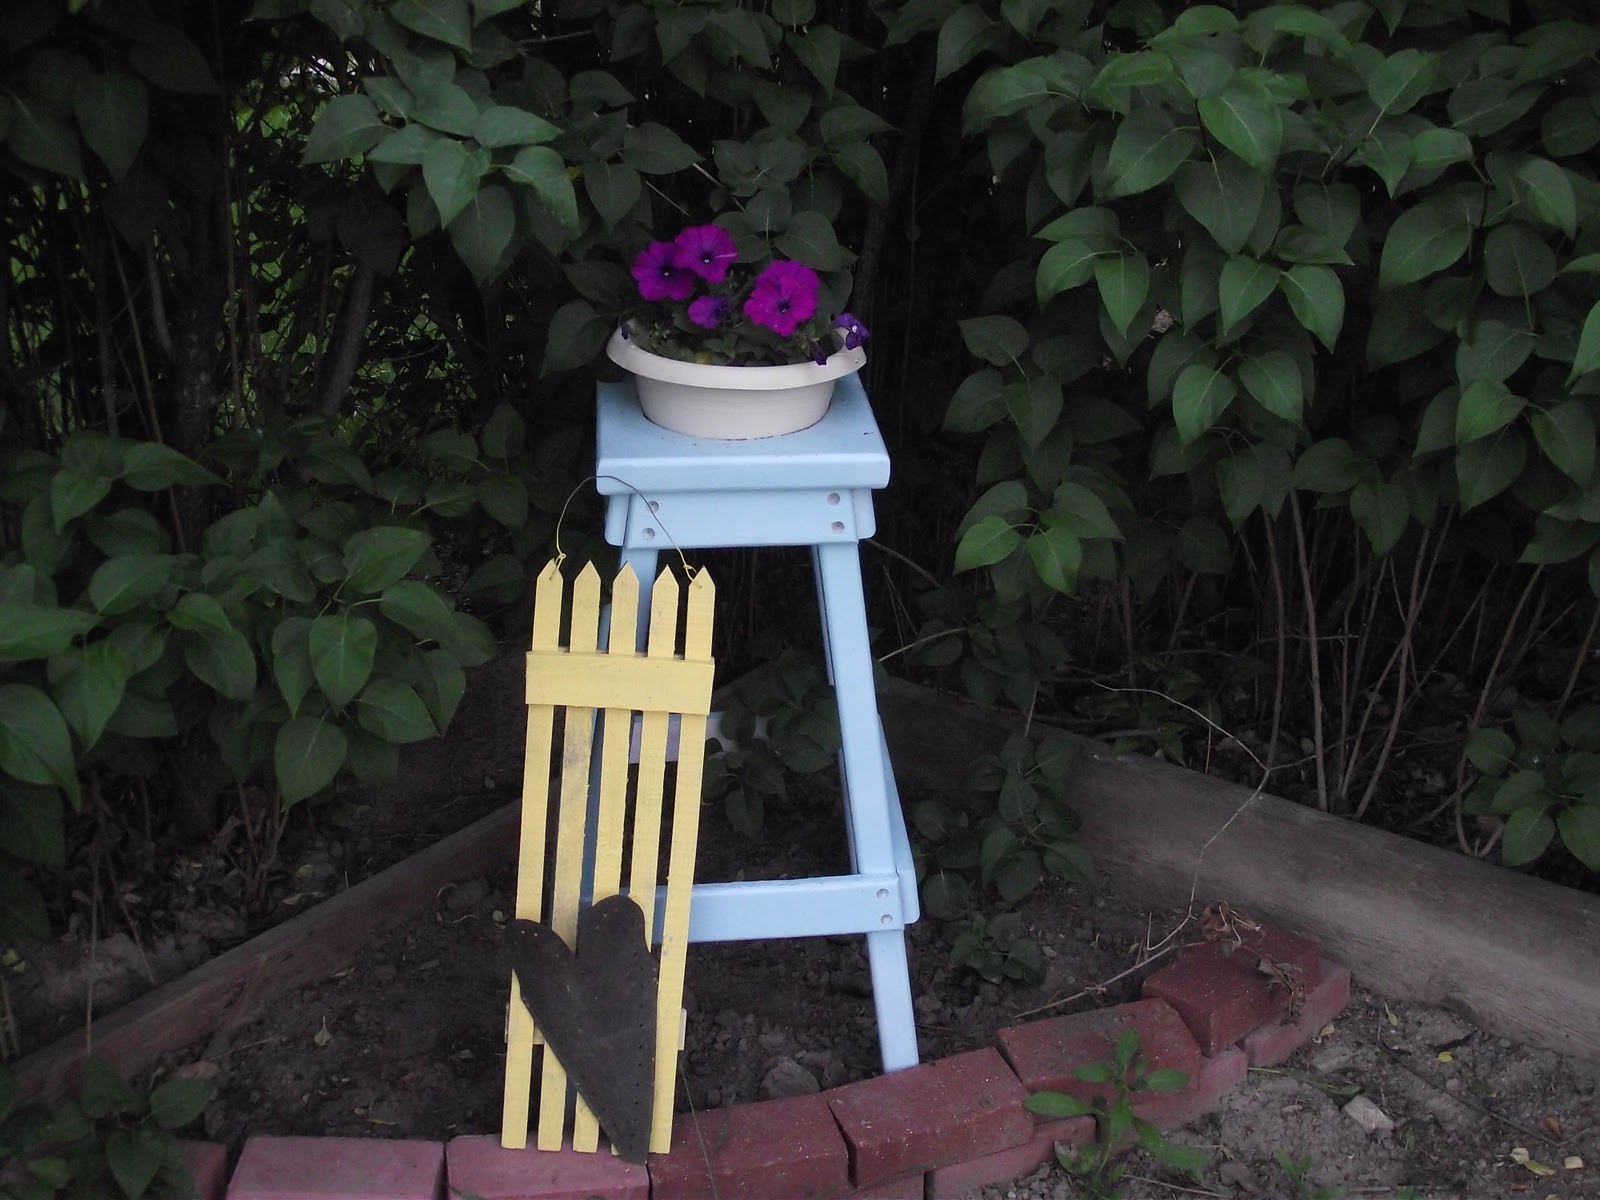
Bar Stool Makeover

I found this great little barstool at the DI the other day for $2 and I knew just what I wanted to do with it! I also found the cute little fence thing there for $1-SCORE!!! 
I can not find my before picture but it was a really dark brown color. First I primed it and then I spray painted it Blue Ocean Breeze (Krylon) and then I sprayed it with some poly. 
 For the fence piece I found this great yellow in a clearance bin at the local hardware store and I knew it was perfect.
Now my little corner is happy & bright and I LOVE it!!

Wednesday, April 14, 2010

Altered Cans


Saturday, April 10, 2010

CARS Birthday

First off I don't know what happened with these pictures and why they are all out of order and some are sideways, they were not like that when I uploaded them, so I am sorry that they are all funky. Anyway, my son LOVES the movie CARS, and so for his second birthday that was the theme that we went with.
For our party favors we made chocolate covered ores with sprinkles and attached a tag that said Thank You on it. I must admit I would much rather eat oreo's this way, they were delicious!
The food table. I kept this pretty simple because I knew all the food would cover any attempts to decorate so I just took a black tablecloth and yellow stripes of paper and made a road. I also found a picture of Flo's V8 Cafe and had it sitting on the table.
This is the wall behind the food table. I made the mini racing flags our of some leftover fabric from another project.
All the party favors ready to go.
I saw THIS idea one day when I was browsing for ideas for this party and I fell in love with them, they are so stinkin cute!! Although mine did not turn out near as cute as hers!!
The BIG Mater balloon that we just had to have.
The Birthday Boy's Special Seat!!
The sign that welcomed our guests to the party. It says "Welcome to Radiator Springs Gateway To Jaxon's Party." I was originally going to have it outside by the road but the weather changed those plans real fast.
The Birthday Boy's shirt that I made for him with all of his favorite characters.
The Birthday Banner!! I love how this project turned out and it was so super simple!! I just printed off the size of triangle that I wanted and then cut out my fabric. I zig-zaged along the edges of the fabric, cut the letters out of red fabric and used wonder under (my favorite thing ever!!!) to attach them to the triangles. To attach everything together I just used double fold bias tape and it worked perfectly!!!

We had Motoroil (grape kool-aid) and Antifreeze (lime Kool-aid) with our dinner.
Luigi's Leaning Tower of Tires, made from mini chocolate donuts.